
We’ll go through a couple of approaches on how to root android phone. The process is “not complicated”, but just in case, you should backup your data. For now we’re going to include just rooting with Magisk. We’ll update the article with SuperSU and other options later on.
Prepare Your Environment
Depending on what you want to achieve and what yout phone supports, computer might not be necessary while rooting android phone (using some rooting apk solution, TWRP, Managers, etc). Again, not all phones (models, kernels, images,..) support everything. Here, we’re going to mention managers, but we’ll mostly rely on a computer. You’ll need a couple of things to root android phone like:
- ADB
- Fastboot
- TWRP image or TWRP App
$ sudo apt-get install android-tools-adb android-tools-fastboot
You can download a TWRP image directly or you can go with the GPlay app.
Unlock Your Bootloader
Unlocking bootloader is necessary when it comes to flashing custom ROMs and rooting. In the preprocess of rooting android phone (in our case Nexus 6P) we noticed it was already unlocked:
$ fastboot devices
$ fastboot flashing unlock
  (bootloader) Device already unlocked!
  FAILED (remote failure)
  Finished. Total time: 0.020s
$ fastboot reboot
Note: unlock will erase all user data from the device.
If your phone is not unlocked, go into phone’s settings:
- Select “About Phone” and tap “Build number” seven times
- Go back to settings, tap “Developer Options” and enable “OEM Unlocking” (if available)
- Enable “USB Debugging”
Non-nexus phones will require of you to get / go through manufacturer’s bootloader unlocking procedure. So, follow up on that on your own (for your model).
Flash Custom Recovery on Your Device
If you’re doing this via TWRP app, you’ll have an option to flash the image from there. If not, do this via computer, find the image you need (TWRP, CWM) and run:
$ fastboot flash recovery <file>.img
Note: Based on XDA forum info you need to flash SuperSU after booting into TWRP or it won’t stick. Don’t flash SuperSU version offered by TWRP, it might not be compatible and can cause problems.
Super User / Rooting Options
Most frequently mentioned are Magisk and SuperSU. Which one to select? Magisk is relatively “new”, while SuperSU is a veteran, and they have different approach when it comes to rooting android phone. We can’t argue tastes, but it seems like Magisk is more popular, so we’re going to go with the flow.
Download the latest root version:
You can download Magisk either with Magisk manager (not available on Goole Play anymore) available on their website or via some apk mirrors. You’ll probably have to enable “Unknown sources” in your phone’s settings. You can also download the ZIP directly.
Within the manager, tap install and download the ZIP.
Root Your Device
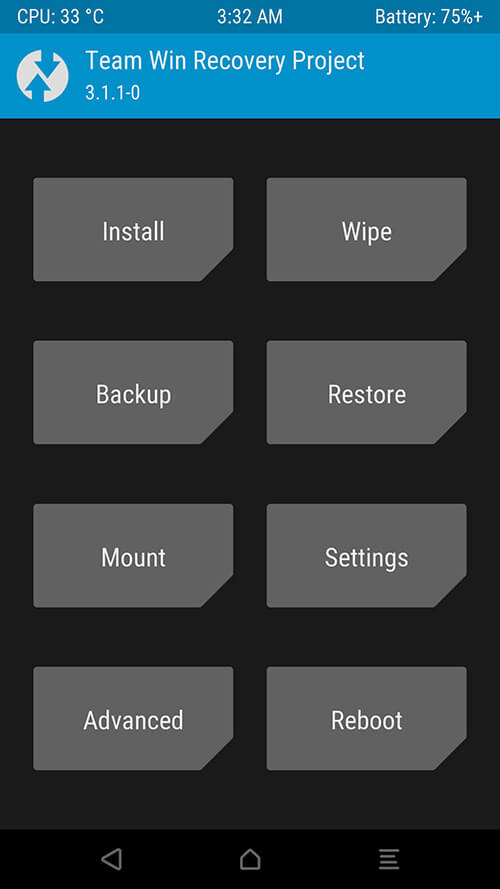
Enter bootloader by pressing Power + Volume down (might differ for some models) and select “Recovery”. You should boot into TWRP. Tap “Cancel” on password request (or insert the password) and Swipe to allow modification:
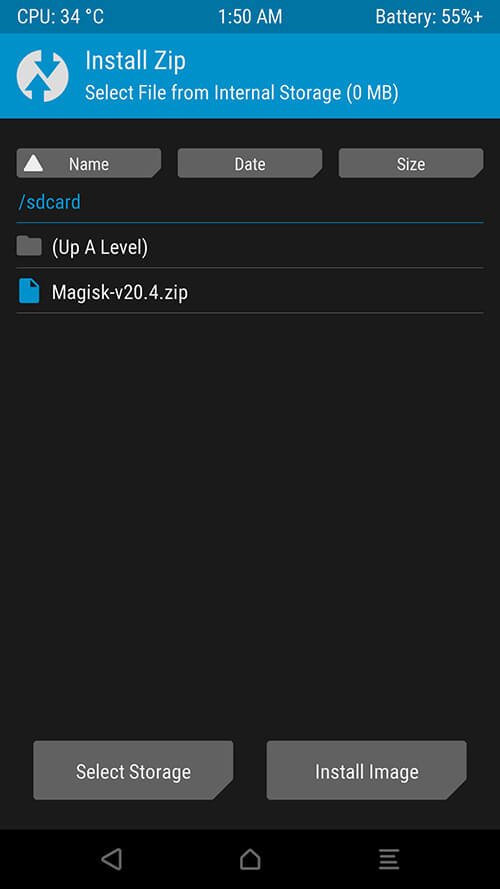
You might encounter an empy sdcard/data, some mount/decryption/wipe things/factory reset, playing around to reach that ZIP you’ve downloaded via Magisk Manager. Apparently there’s some issue with some old TWRP versions / Android 8+ (decrypting / encryption support).
We were using an old TWRP version, and in order to cricumvent this (quick & tmp), you can you can push ZIP archive via ADB:
$ adb push Magisk-v20.4.zip /sdcard/
 Magisk-v20.4.zip: 1 file pushed. 7.4 MB/s (5942417 bytes in 0.769s)
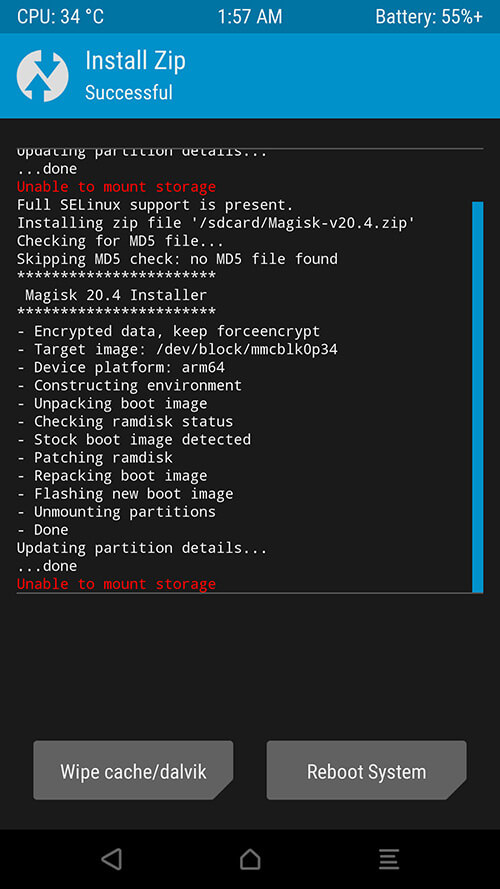
Open the ZIP file, swipe to confirm flash/install:
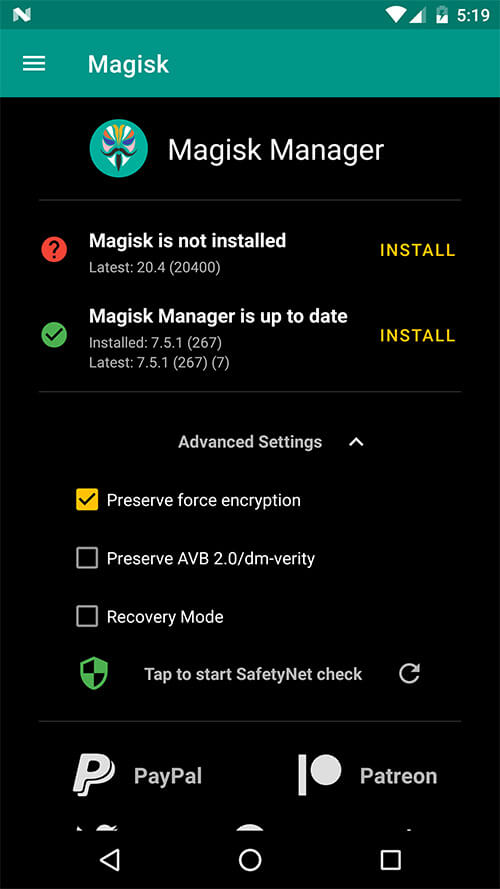
Reboot the phone and check the Magisk Manager:

This concludes the root android phone process with magisk.
Super SU
Changes system files and adds new ones. Since google strenghtened security (with Marshmallow), this might “generate” some issues like not being able to run certain apps with SuperSU, not geting OTA updates, etc.
Magisk
This is a “systemless” root, it doesn’t touch any of those system files, but it does change the boot partition, essentially overlaying everything.
Conclusion
Nothing more to add on how to root android phone, it’s a straightforward process. Nothing to it, but if you don’t know what you’re doing, you CAN mess things up. The net is overflowing with the information on this subject, starting with XDA Developers, check it out.

![Clone Micro SD Card [Raspberry Pi, Linux, dd]](https://cdn.cyberpunk.rs/wp-content/uploads/2019/08/clone_sd_card_bg-500x275.jpg "Clone Micro SD Card [Raspberry Pi, Linux, dd]")
")